Pottery Drawing:
- Open new layer, rename to Main lines.
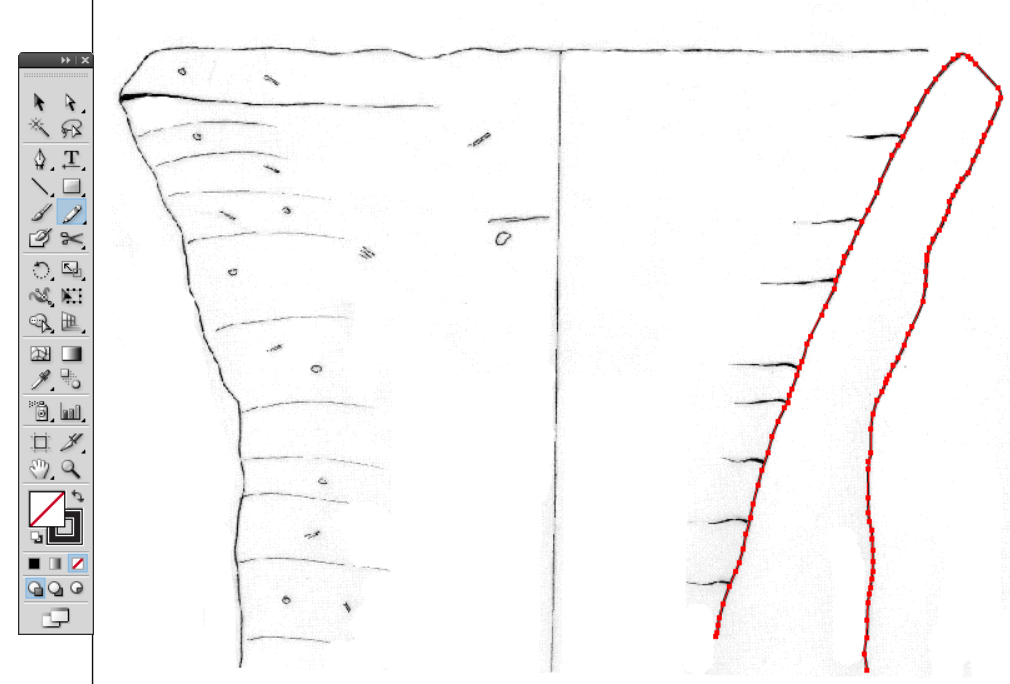
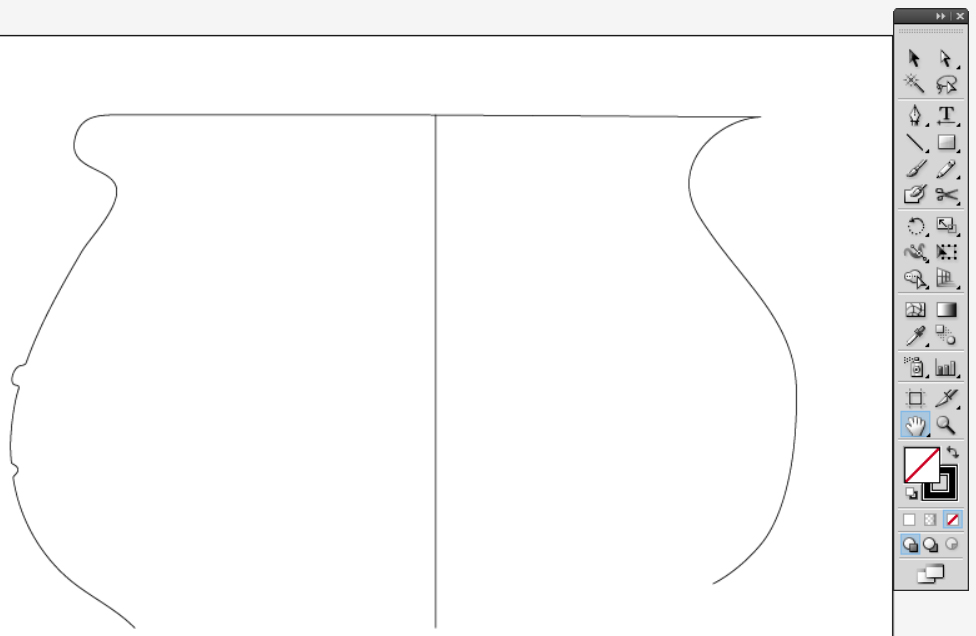
- Draw the pottery’s section by using “Pencil Tool” or “Pen Tool” From Tools Panel.
- Note: when you draw pottery shards rim, keep in mind, To zoom in until you have the whole rim shape but not part of it, to have the whole vision of the rim, otherwise you may lose part of its carves or details.
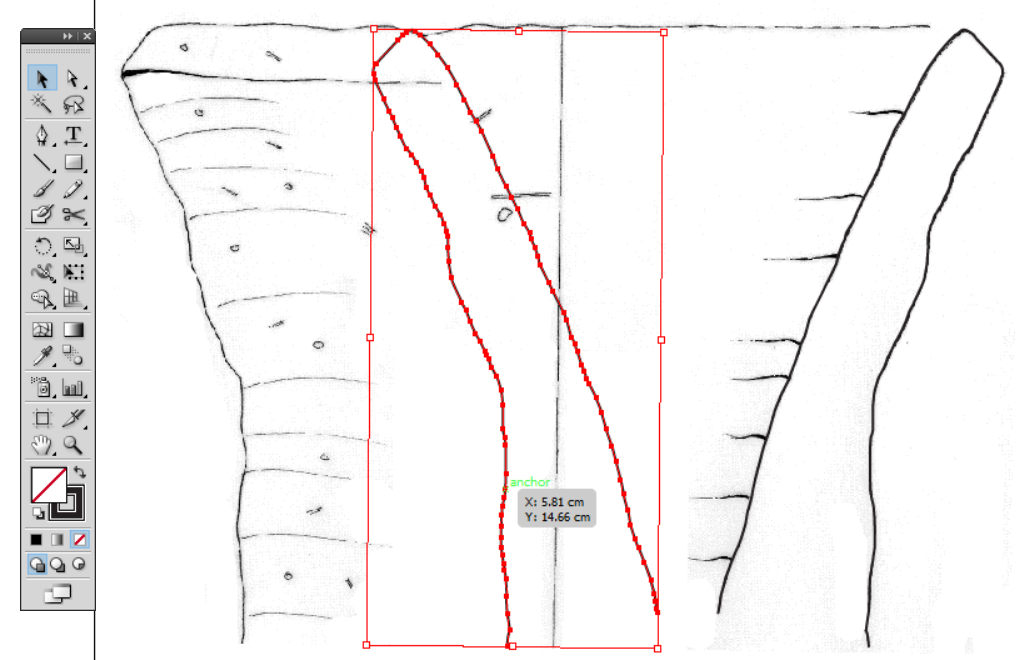
- To draw the pottery’s profile you have either two options:
- Reflected copy, if it’s draw originally through this method:
- Select the section by using “Selection Tool”.
- Right click, transform > Reflect.
- Reflected copy, if it’s draw originally through this method:

- In Reflect panel mark Preview and Horizontally.
- Click Copy.
- A reflected copy of the profile should be created.
- Move the copied shape by using arrows key in the Keyboard or by hold the shape until matching that shape with section shape in the other side.
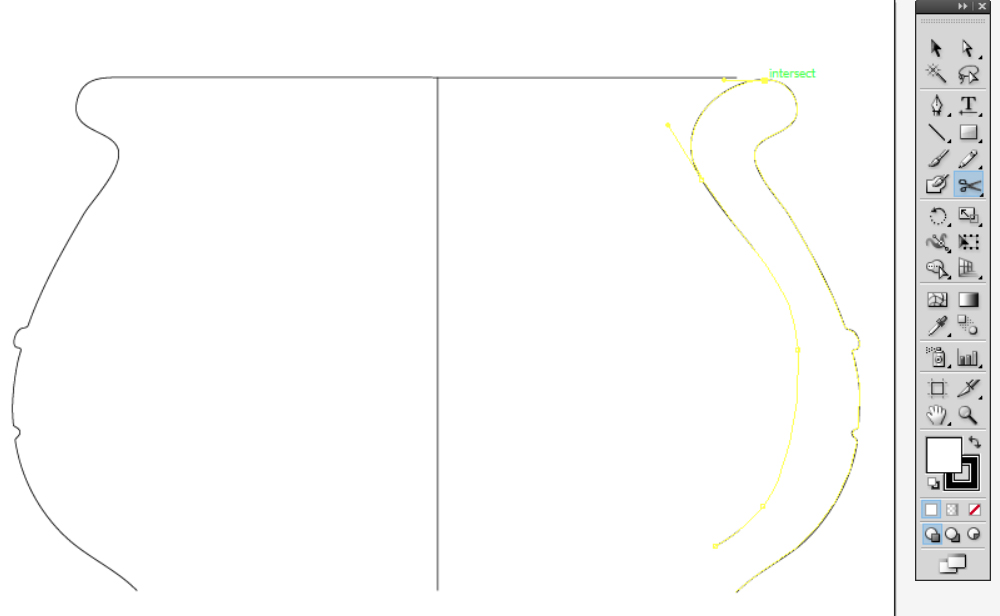
- Use the Scissors Tool to cut the most toped point in the copied shape.
- Delete the inner part.
- From the highest point, draw a straight horizontal line by using “Line Segment Tool” from Tools Panel with keep holding the shift key in the Keyboard, pull the mouse until reaching the highest point in the profile in the other side, then free the mouse of tablet’s pen.
- or “Pencil Tool” depend on the rim line if it’s straight or irregular line .
- Or draw just like the section by using “Pencil Tool” or “Pen Tool” From Tools Panel.
Note: this method usually used when you have more than 50 % of the pottery shape.
Note: it might that the copied shape or the section doesn’t match totally with original shape, that’s not problem, mostly the draftsman reflected the section with wrong angel or he didn’t trace the reflected copy in right way, in this case, appoint the copied shape to the highest point of the original shape.
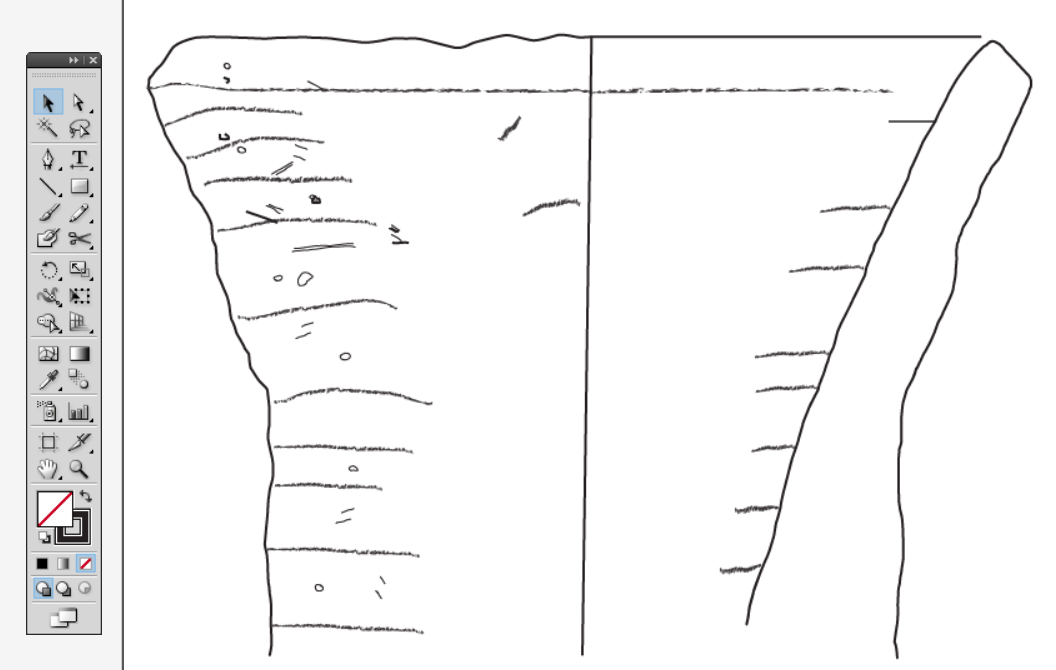
- Draw the center line also by using “Line Segment Tool”.
- Then draw the detailed lines as shown before.
Object and pottery sun and shadow:
The sun and shadow in the objects and pottery drawings, is quite different from the Scenes.
For example in pottery, there are three methods:
Normal shading, dot shading, gradient shading and 3D effect shadow
Normal shading:
By using the normal “Pencil Tool” to draw the whole details horizontal lines.
Then open “Brushers Panel”:
Window > Brushers
Open Brush Library > Artistic > Artistic_ChalkchercoalPencil.
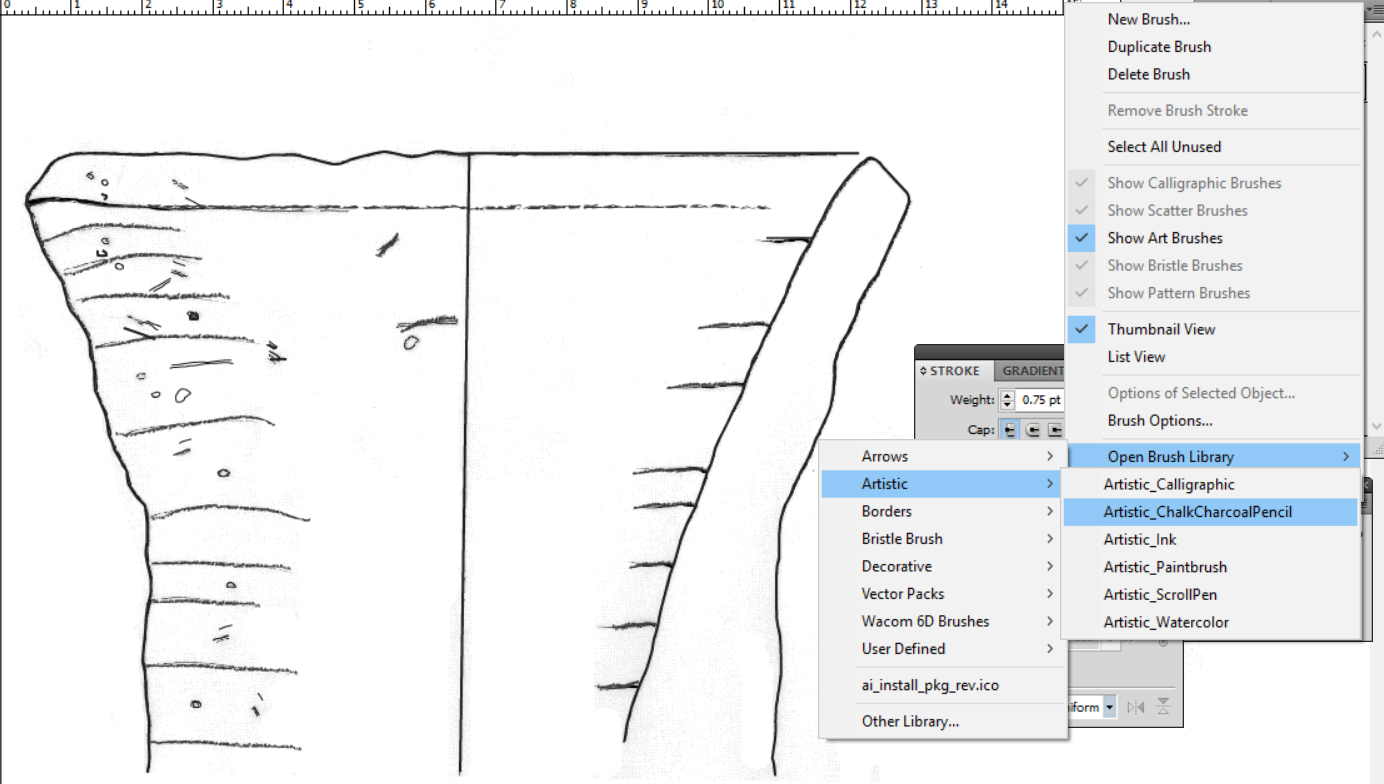
Active the detailed lines, then click on the Brush.
Adjust the line’s performance by double-click the brush in the “Brushers Panel”.
Dotted (stippling) shading:
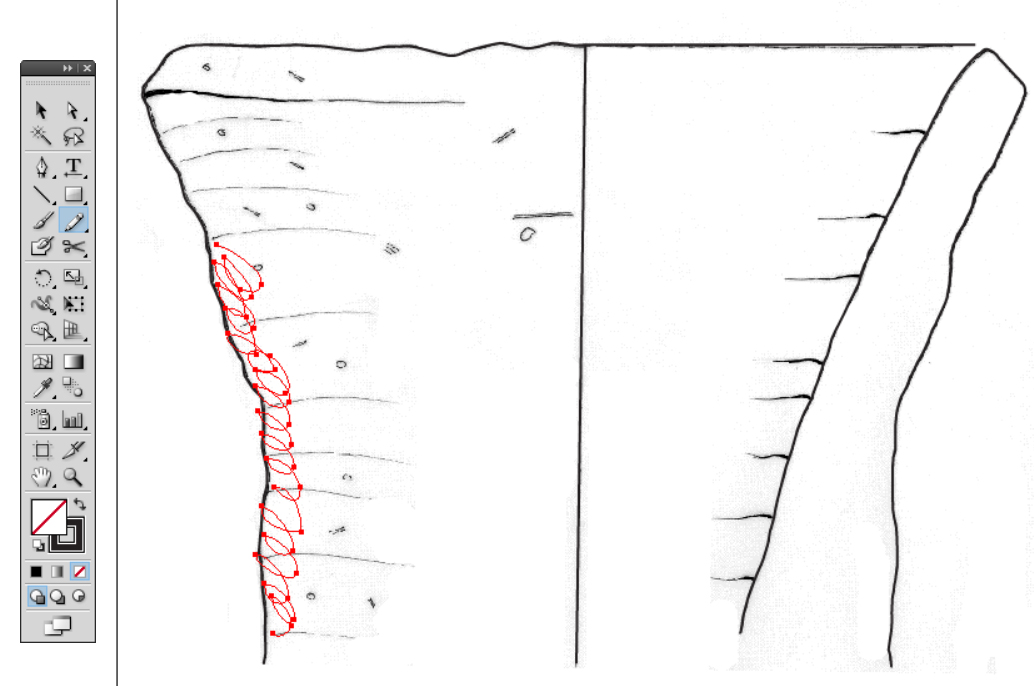
Many thanks to P. Collet, who showed us this method.
In this method, you don’t use lines but dots.
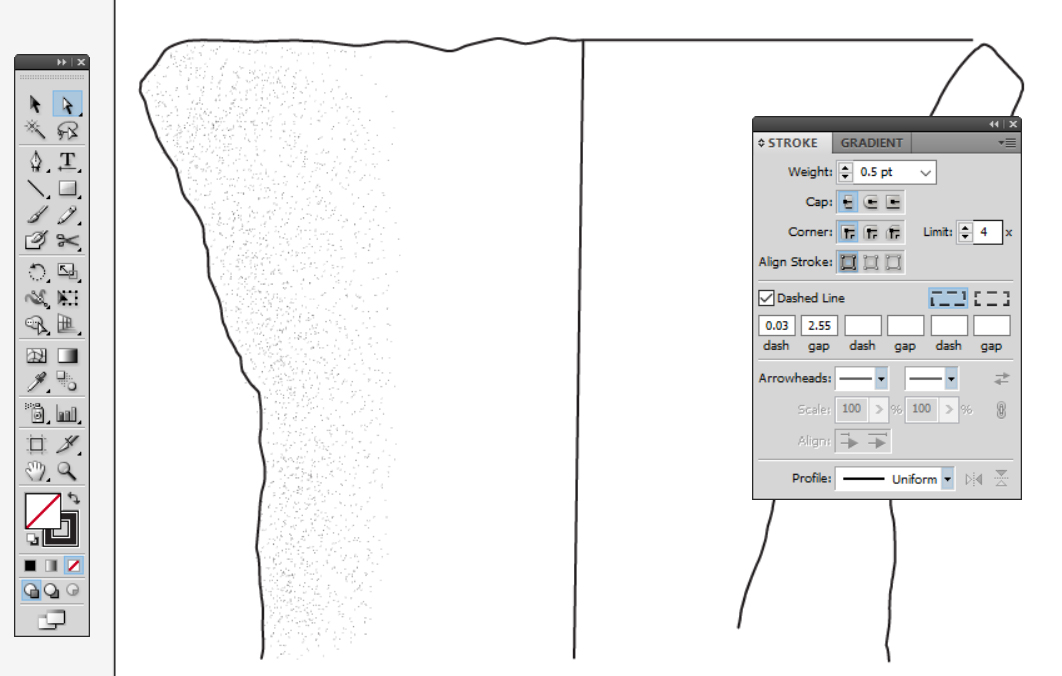
By “Pencil Tool” draw wavy circles.
In “Stroke Panel”, mark dash line.
And add those values:
Dash: 0.03 pt
Gap: 2.55 pt
Weight: 0.25 pt
Repeat those steps until you get the needed shadow.
Note: You may join the Normal shading with Dot shading together in the same object or pottery drawing.
Note: also you may change the Gap’s value if you felt that it’s too heavy or dark, at the same time you may zoom in and out to make sure the resulted shadow is what you need at the end.
It happens sometimes, that during using this method, one or more of waves lines come out the profile or the section, in this case, do as following:

Select the waved line that came out by “Direct Selection Tool”. By the same tool choose the anchors and drag it inside the shape.
Note: it is better when you use this method to printout the drawing, to see the actual view. Also this method is very useful in shading object drawings.
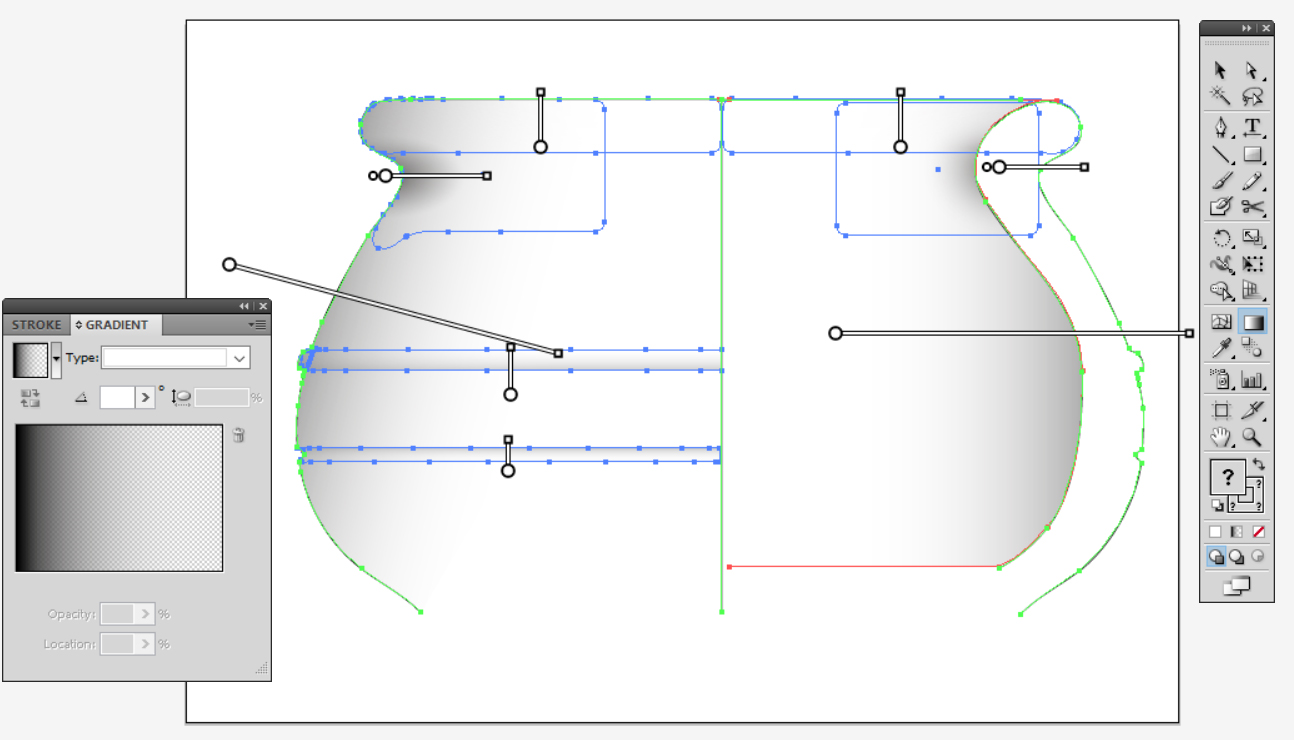
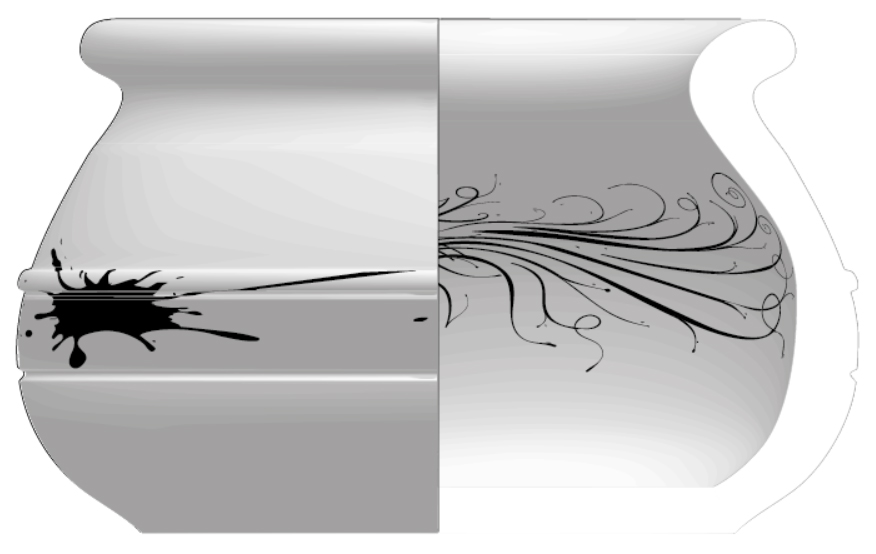
Gradient shadow:

By using the “Gradient Tool” and Gradient Panel.
Follow the same steps to represent “Vanish area”, but change the color from white to black. One more thing, in Vanish convention you draw random shape, but in pottery drawing, you have to trace the same shape of the profile and the section, and make the center or the begging of the gradient out of the shapes, see below.
In the very rounded areas, e.g., the rim (in the section or the profile), it might be better to change gradient type in the “Gradient Panel” to Radial.
Note: in Radial option you can control on the radius and the angle if the gradient.
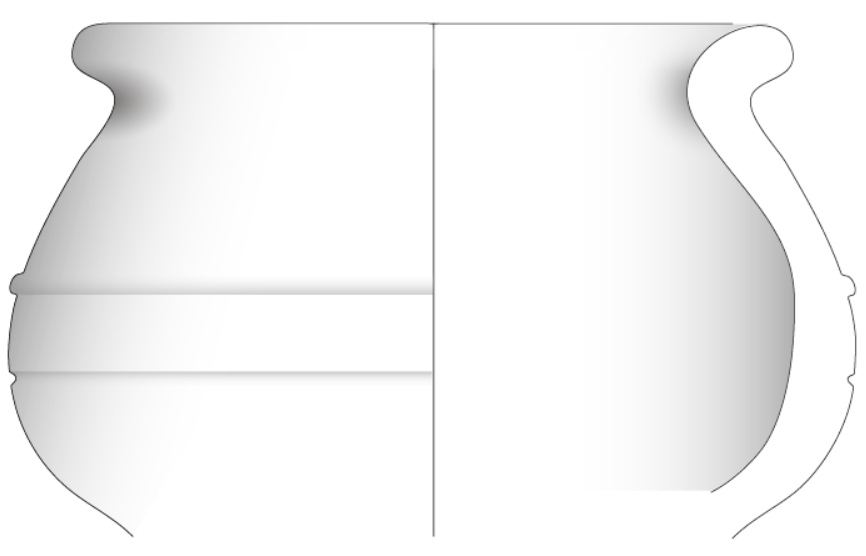
In the raised area: the gradient is from up to down.
In the sunk area: the gradient is from down to up.
After you finish drawing the whole details, you add two gradient areas in the inner side of the profile and section of the pottery drawing.
Note: Those two areas should be above the all details gradient.
To add gradient areas, do as following:
- Add new two layers, rename it with “General gradient areas” and the other with “Detailed gradient areas”. Where the general ordering of the layers form up to down as following:
- Main Lines – General gradient areas – Detailed gradient areas
- Copy the main outlines of the section and the profile by using “Selection Tool”.
- Active the Detailed gradient areas layer, Edit > paste in place.
- Close and hide the main lines layer and General gradient areas layer.
- In the Detailed gradient Areas layer.
- In the section side cut most top point by using “Scissors Tool”.
- Join the rim line in the side of the section with the inner shape of the section by using “Pen Tool”.
- Do the same with profile.
- Cut the rim line in the centerline.
- Open General gradient areas layer
- Now copy the resulted shapes and paste in place in the General gradient areas layer.
- Close and hide the main lines layer and General gradient areas layer.
- Back to Detailed gradient Areas layer
- Draw the rectangular areas to cover the needed areas, one of the sides ended in the centerline and the other side ended out of the shape.

- By the “Selection Tool” Choose the shape and the rectangular.
- Window > Pathfinder .
- In Pathfinder Panel, under Pathfinders > Divide.
- You will note that areas between the rectangles were deleted.
- Select the unneeded areas by “Direct Selection Tool”.
- Delete it by double (indirect) clicking delete key in the Keyboard.

- Do the same with section side.
- Change the stroke color in the Detailed Gradient areas layer and General gradient areas layer to :None.
- Fill the cut shapes in both Detailed Gradient areas layer and General gradient areas layer with Gradient Tool as described above.
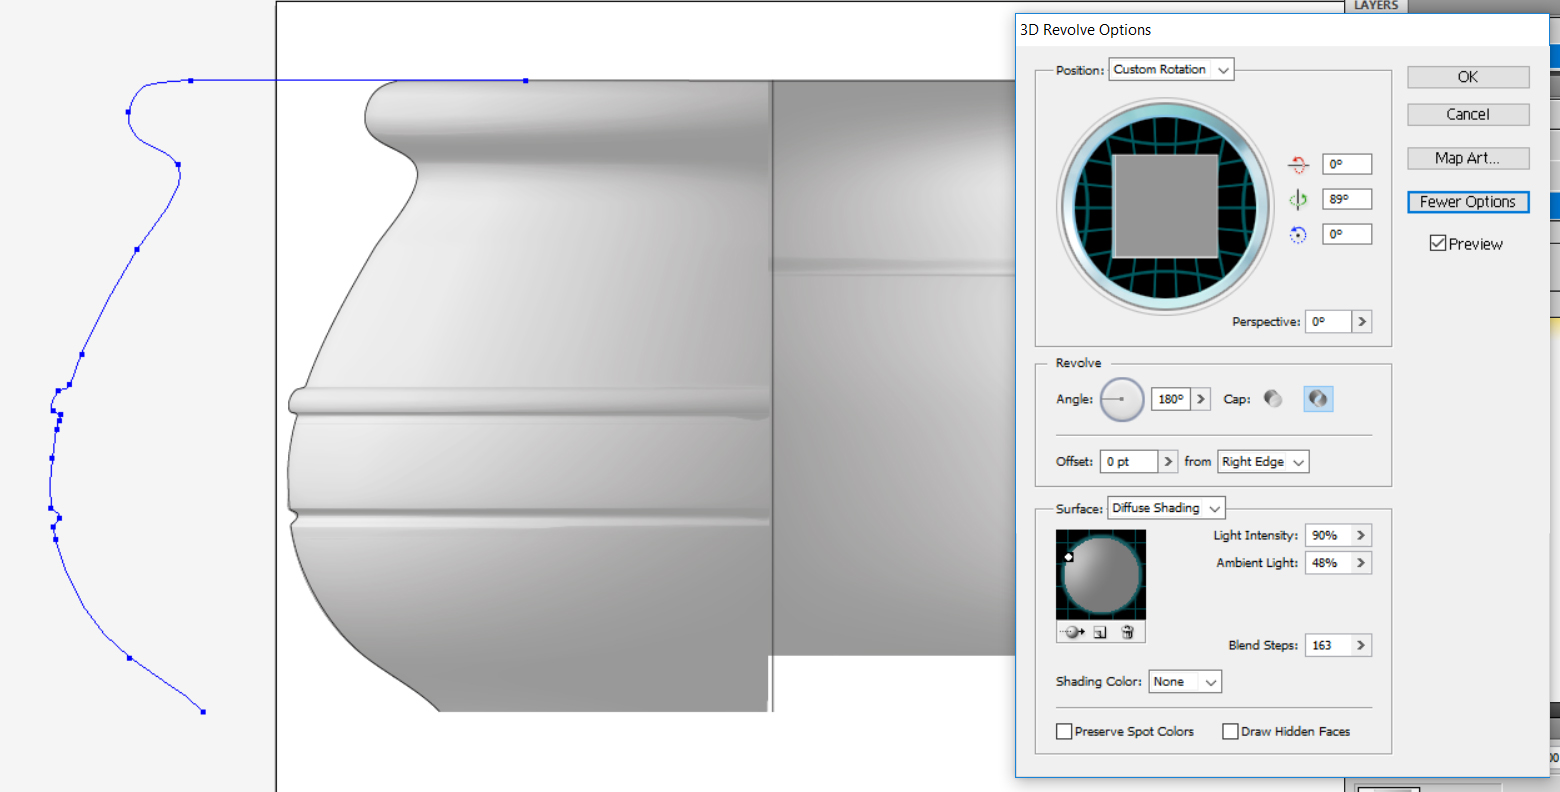
3D effect Shadow:
Also you can add shadow to the pottery shards by using 3D option, as following:
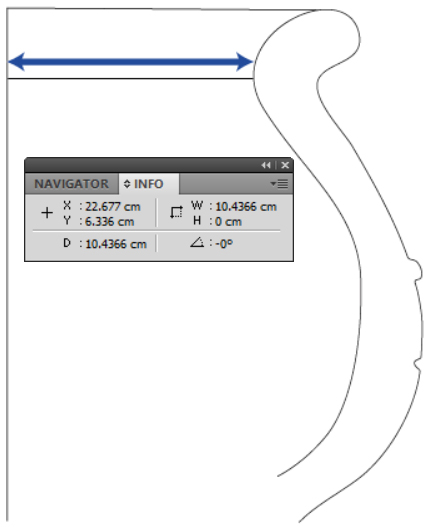
Select the profile part.Now measure the distance between the most inner part of the profile and the center line by using the “Measure Tool” from Tools Panel”, and click the beginning point and the endpoint.Once you click the beginning, the Measure Panel will appear. In the left corner you will find the measurements if the distance once you click the endpoint. Flip it, right Click on the profile, Transform > Reflect, mark Vertical, then OK.Move the profile to the centerline.Effect > 3D > RevolveFrom Revolve Panel, click “More Options”.
- Mark Preview box.
- Enter values:
- in the horizontal (x) axis : -180, vertical (y) axis : 0, and depth (z) axis : -180 in the text boxes.
- Angle: 270
- In the Offset option, here you inter the value of the distance between the most inner part of the profile and the center line. Its unit is PT, normally cm = 28 pt.
- From: Right Edge
- Surface: Diffuse Shading
- Shading Color: None
- Adjust the shading point to : upper left corner.
- Click Ok
You will note 3D shading has been done but was shifted to right.
You can adjust the revolve options, by select the shape you want change, in Appearance Panel, click “3D revolve”
Note: You may need to adjust the shading point according to the shape you have.
- Show the Main lines layers
Sometimes you have a pot with handle which you want also to add 3D shading to it. In this case, do as following:
- Make the handle as close shape by using “Pen Tool” from Tools Panel.
- Follow the same 3D shading technique of the body, but in the offset value you add not 270 but 180.
Note: make sure that the sublayer of the handle is under the sublayer of pot’s body.
- You will notice as well, that inner part of the handle was filled with same colors of the pot and the handle, therefore, you would draw separate shape of inner part and fill it with white color.

Add decorations:
Decoration around the body of the pot may be shown ‘unrolled’ to the right or, if the decoration is quite simple and repetitive, drawn out on the curve of the pot[1]
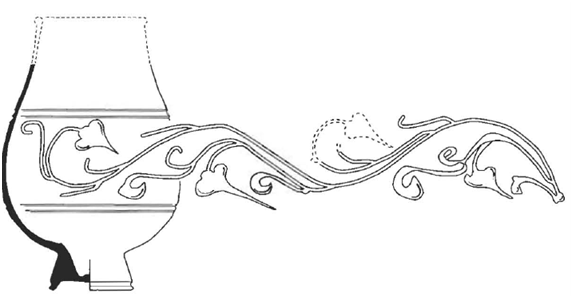
To represent the first method, you just follow the normal steps to trace it as a part of scene in separate layer.
But if you decided to draw out on the curve of the pot and you have that decorations as unrolled, you do as following:
- Trace it in Illustrator in a separate layer.
- Open “Symbols Panel” Window > Symbols.
- Drag the unrolled decoration into “Symbols Panel”.
- Save it with name of “Decorations” , follow the same steps of saving symbols see above.
- Now draw the pot which want to add the decoration to it, see above.
- Apply the 3D effect Shadow steps to that pot, see above.
- Open “Symbols Panel”, go to Open Symbols Library > Other Library > Decorations (the saved symbol’s file).
- Open “3D revolve Panel” > Map Art.

Will notes that, part of the pot (in this case the profile) was divided to many parts which you can choose the artwork to map to the selected surface from the Symbol pop-up menu.
- To select which object surface you want to map, click the first , previous , next , and last surface arrow buttons, or enter a surface number in the text box[2].
A light gray color mark appears on the surfaces that are currently visible. A dark gray color mark appears on the surfaces that are hidden by the object’s current position. When a surface is selected in the dialog box, the selected surface is outlined in red in the document window[3], do as following:
- To move the symbol, position the pointer inside the bounding box and
drag; to scale, drag a side or corner handle; to rotate, drag outside and near
a bounding box handle.
- To make the mapped artwork fit to the boundaries of the selected surface, click Scale To Fit.
- To remove artwork from a single surface, select the surface using the Surface options, and then either choose None from the Symbol menu or click Clear.
- To remove all maps from all of the 3D object’s surfaces, click Clear All.
- To shade and apply the object’s lighting to the mapped artwork, select Shade Artwork.
- To show only the artwork map, not the geometry of a 3D object, select Invisible Geometry. This is useful when you want to use the 3D mapping feature as a three-dimensional warping tool. For example, you could use this option to map text to the side of an extruded wavy line, so that the text appears warped as if on a flag[4].
- Click OK in the Map Artwork dialog box.
[1] – Lesley collett, p. 28.
[2] – Using ADOBE® ILLUSTRATOR® CS5
